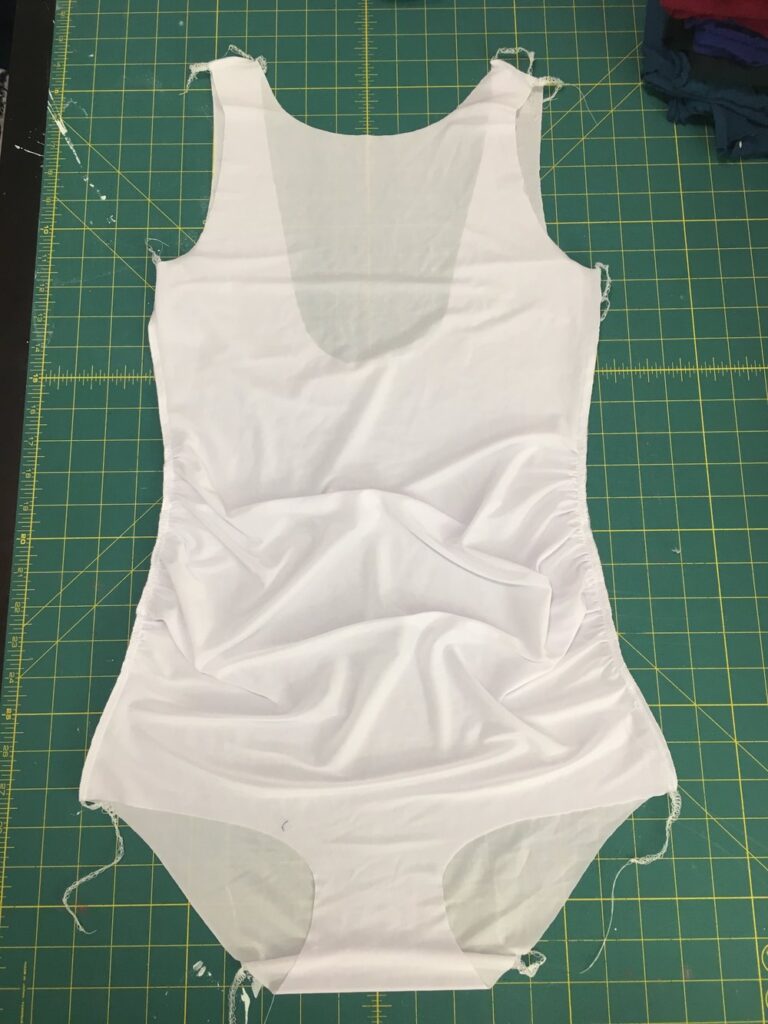
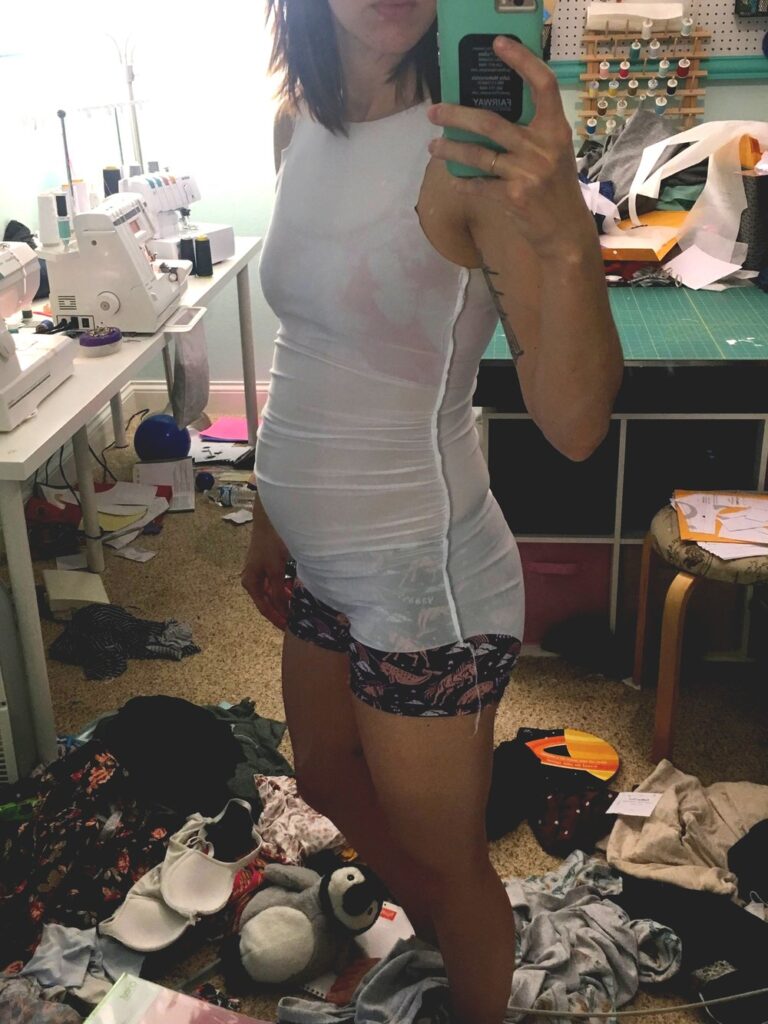
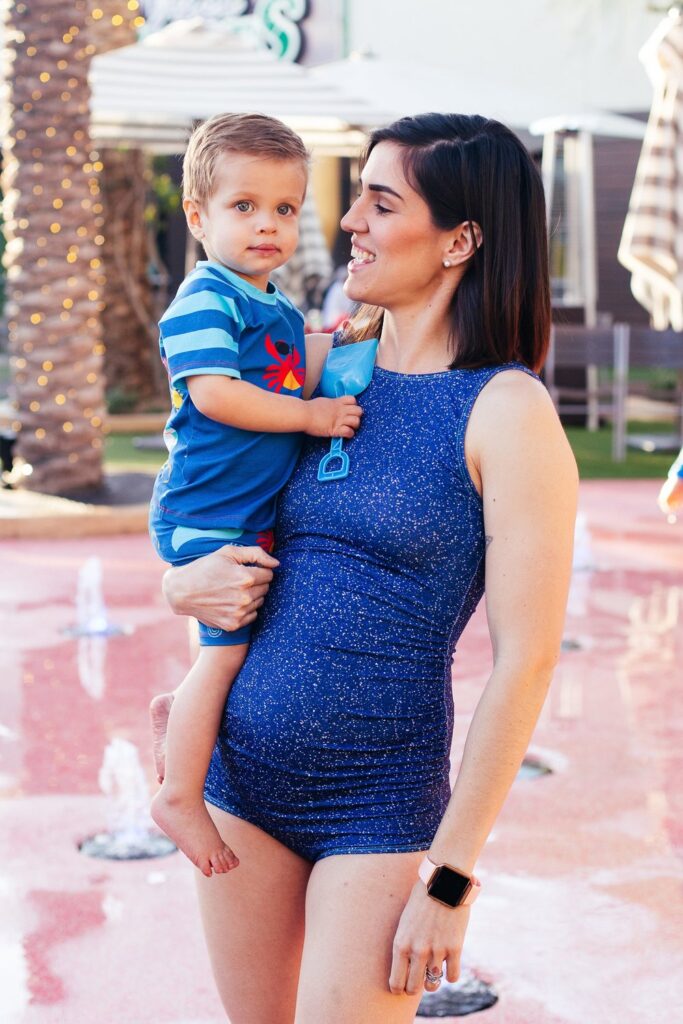
Making it Maternity – Mairin Swimsuit – Maternity Hack

Happy halfway to me! I can’t believe I’m already 20 weeks and that it’s already almost April. Where has the time gone?! It’s going to be summer time before we know it! Which means….allll the swimsuits!

The Mairin Swimsuit from Sew A Little Seam is definitely one of my all time favorites. You cannot go wrong with it! The only main issue is that it’s not really bump friendly, unless you make a bikini and low rise bottoms! But I don’t always want my belly hanging out (ha!). So I decided to hack it so the one piece is a little more bump friendly! The only thing I might do differently next time is maybe grading out a tad bit more (we will definitely be finding out how long I’ll be able to wear this suit for soon enough!) and doing the low back option instead of the mid back and adding loops so you can have adjustable tie straps (that will make it easier to get on and off when your belly is a lot bigger, further in your pregnancy.)

This was a pretty easy, simple hack. The only piece I changed was the front and I used the P4P Layer Me Up maternity add on to hack it. You probably don’t want to just add length and ruching to the suit since swimsuits are pretty fitted as it is, which is why I used the P4P add on. It adds length as well as extra belly room.

You will start off by tracing part of the front piece, whichever option you prefer. Trace the entire left edge (where the fold is) and the rest of the top down to the bikini line on the right.

I fall under size small for the LMU, so I already had that size cut out. The LMU maternity add on has triangles on it for guides on where to gather. I then lined up the first triangle with the BIKINI cut line and lined up the top right edge of the maternity add on to my size line. In this instance I lined it up with size 4/6. (You can see that it goes past the swimsuit fold line. That’s fine. Just make sure it’s even!) Make a horizontal mark at this triangle.

I then traced the maternity add on all the way down to the first triangle on the bottom. Make a little horizontal mark at this triangle also.

I lined up my horizontal line about where the high leg cut line is. As you can see, I probably should have moved it up a tiny bit to match the high cut leg option. Oops! (However, if you plan on making the high cut leg, make sure your gathers/ruching end 1/2-3/4” above the cut line so the bulk of the gathers aren’t in the way of your elastic. In other words, put that little horizontal mark 1/2-3/4” above the high leg cut line.) Make sure your left traced line is still matching up with the swimsuit fold line. Since my hips fall under size 0/2, i traced that size on the bottom. Once you get to where the maternity add on ends, you may need to do some tracing outside the lines to connect them.

Boom! Your front piece should be complete! Make sure those horizontal lines are inside the pattern so you can still see them when you cut out the pattern. We will use these marks to indicate were to gather on our lining and main fabric. Cut out your back piece. I like the wide strap since I get to use one continuous piece of elastic for the neck/around the back. I don’t recommend the high back. It will get pretty hard to put on your suit with a big ol belly. Lots of shimmying! Definitely mid back or low back. If you do the low back, I suggest adding loops similar to the low back/narrow strap. Or just make the narrow strap version. It’s pretty cute. (See my non maternity version here!) This way you can add an adjustable strap just along the back that you can tighten or loosen with that growing belly instead of the fixed elastic straps. It also will probably be easier to get on and off since you can loosen them.

Since I normally measure 4/6 for bust/waist and 0/2 for hips not pregnant, I just used that for my back piece. No special grading.

Let’s get sewing!

I just used 2 basting stitches to gather and did not use any elastic. I did the same thing for my lining and my main swim fabric. Beware. The lining kind of sucks to sew basting stitches! You might need a little bit of extra tension when sewing this! I did 1/4” from the edge, in between each line that we marked on the pattern piece. And then another basting stitch about 1/4” from the first one. Once your basting stitches are sewn on both sides, go ahead and sew your shoulder seams and the front to the back at the crotch/bum seam. Pin your front side seam to your back above and below the your basting stitches. I like to put a pin right up to one side of the basting stitches and wrap my thread around the pin so it won’t pull out when I’m making the gathers. Once your front fabric is gathered enough and matches the back, I put a pin in it again and wrap the thread. manipulate your gathers so they are even and look nice and pretty! Sew up your side seams!

If you want, you can add elastic in the seams, but I did not. Also, there is a pretty good chance that you will need to remove the basting stitch furthest from the edge as it more than likely did not get caught in the seam allowance. You also may want to take out other one or snip it at different places so the fabric isn’t super restricted on that seam. Oh, and don’t forget to add swim cups! Repeat for the main fabric and continue sewing as the pattern directions say!

Isn’t it cute?! This is probably my favorite swimsuit I’ve made so far. Hubby loves it too! And the fabric!! Blue glitter! It’s currently on pre-order with a handful of other super cute fabric over at Bubble Baby Custom Fabrics and pre-orders close on April 9th! You have to hurry if you want some! Fabric is estimated to ship out May 6th! Click the image to see a snippet of available fabrics in the round! ————>

Available fabric bases are cotton lycra, swim, woven, french terry, double brushed poly and minky!

I can’t wait to take this swimsuit out to the splash pad and swim class with Max! I’m also curious to see how long it will fit! This will be a test to determine if I need to make any changes to the hack on my next one! Since there will always be more Mairins! <3

NOTIONS!

If you need swim elastic or swim cups, my favorite place to order those is from Sew Sassy Fabrics!

Thank you to my amazing friend Annie for taking these pictures! <3 If you are in Phoenix and need some photos, check her out!

If you have any questions on this maternity hack, feel free to leave a comment below! To see all Making it Maternity posts, click here! (there will be more later, promise!)

One Comment

Leave a Reply

Your email address will not be published. Required fields are marked *

Never miss a post!

Subscribe via email and receive new posts right to your inbox.