How To: Convert a PDF Sewing Pattern into a Copy Shop Print File
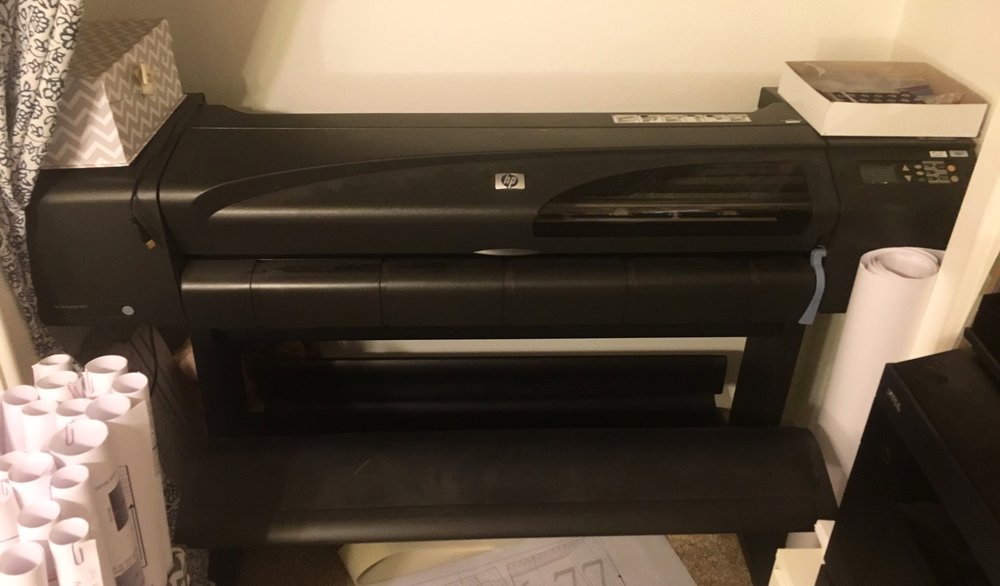
One of my most prized possessions in my sewing room is my big monster printer, AKA an HP Designjet 800. The company my dad works for was upgrading their machines about 2 year ago now, and he thought to get one and give it to me! Best thing ever. It’s a BEAST. It barely fit inside the closet!
If you’ve sewn up PDF patterns before, taping/gluing 20+ pages together is the WORST. THING. EVER. I refuse to do it at all costs! It is nice when a pattern designer/company offers Copy Shop or A0 print files, however, going to a place to get the pattern printed can get pricey, but totally worth it, in my opinion. (Or just come to my house and I’ll charge you $5 a sheet instead! *Wink wink*). So, lucky for me, I can print it myself!
If you are jumping on the Projectors for Sewing train, be sure to check out my post HERE on connecting a Vivimage Explorer 2 to a MAC using chromcast, as well as inverting colors for better visibility on dark fabrics.
Anyway, so some companies don’t offer A0 or copy shop print files and that is totally fine. You can just make one yourself! It takes a little bit of time, but totally worth it since you only need to do it once with each PDF pattern. At first I thought that this will only work with NO-TRIM patterns or patterns that have no extra borders or spaces before you print, but that’s not the case! (However, it’s a million times easier…). If you pattern pages do have boarders, you will just have to crop each page. That will get tedious, but again, you will only have to do it once for each pattern. Also, keep in mind that you may have to do some finegaling when it comes to laying out the pages since it can only be 36 inches wide and up to 56 inches long. Please note: The original paper pattern MUST have instructions to be printed at 100%. If for some reason the pages should be printed smaller or larger than 100%, this process WILL NOT work since the test square will be larger or smaller than what is called for the pattern. If you test square is off by even 1/8 of an inch, your finished garment will not fit as intended.
BTW, I mentioned doing this (super condensed version) in a pattern company group and my comment got DELETED. Rude! If someone has your pattern ALREADY purchased and there is no copy shop file, there is nothing wrong with learning how to convert it to a copy shop print! It might actually make more people BUY your pattern if they only want ones that can be printed on a large format printer. Okay, rant over.
*PDF Stitcher* To use with a projector
So, there is an even better/easier way to convert patterns (unless the program gets removed).
- Start by going to the website SEJDA to edit your PDF, like removing unwanted pages, crop pages, etc. (though it’s not necessary to remove any pages). If your PDF pattern layout has blank areas but no blank pages on the actual file, you will want to add those here. The stitcher will need a place holder for the blank pages for it to work properly.
- The site is free with a max of 3 tasks per hour. Make sure you use the ORGANIZE tool so you can add/delete/reorder pages all on the same task.
- I don’t suggest using this tool to crop. It’s best to just use it to add blank pages and remove the instructions. I tried cropping and it ended up removing the layers. Not sure if that was specifically the cause, but just a heads up! You will want to crop using the Stitcher tool.
- Download the latest version of the PDF Stitcher tool HERE.
- I have a MAC and it won’t let me just open it. I have to open it in a FINDER window and press control+Click icon, select open from the pop-up. You will have to do a similar sort of thing on a Windows.
- Once you have the stitcher open, select your file, add page range, the number of columns and rows and if you need any of the margins trimmed (if your print at home pattern is “no-trim” and has pages that overlap)
- Click to Generate the PDF
- You will get a pop-up to save your new file
Boom! That’s about it! You should now have a pattern that you can use with your projector! And the best part is, all the layers will be in tact! If the pattern has any tiling layers, don’t forget to turn those off.
LET’S GET CONVERTING!
* The first step is to convert your PDF file to JPEG. The best website I have found to do this can be found here. Since this is free, you can only convert one file every 60 minutes. In order to convert as many as you’d like in an unlimited amount of time, go ahead and sign up for the membership, but in my opinion, it’s not worth it. Just wait until enough time has passed for you to convert another.
(EDITED TO ADD) * If you want different layers, you are going to need to save the PDF with the specific layers. Just turning off the layer view doesn’t work. (At least that hasn’t ever worked for me.) On a PC, what should work is print your pattern to a PDF. That will save it in a way that you can’t make changes, but the selected layers should be the only ones visible. Repeat the process as many times as you want with the different sizes. On a MAC I have not figured out how to save with only specific layers visible. My Mac does not let me print to a PDF. It gives me an annoying error and I haven’t figured out a way around it
* Once that is done, download the file, expand the .zip and open up Microsoft PowerPoint. Just open up the plain white template. Remove any text boxes so the slide is BLANK.
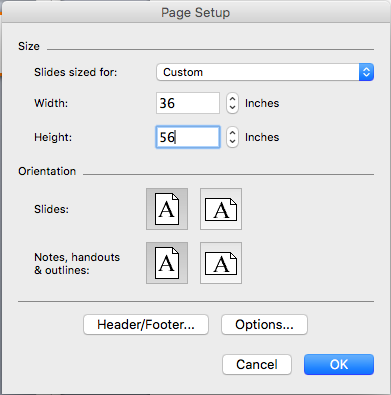
* Next, you will need to change the height and width of the slide. (I have a MAC, so this is what I do. I imagine it should be fairly similar on a PC.) Select FILE > Page Setup. Width should be 36in and height should be 56in. Select OK. You most likely will get an error since it exceeds the printable area. Just select OK to continue with those page dimensions.
* Now, we will basically lay out the pattern like you would if you were taping it together, but on our computer! Make sure your slide is expanded so you can see the entire slide. Open up the file folder where your converted pages are. Most pattern companies will have the instructions and the paper pattern in the same file, which means all those pages we don’t care about for this process have also been converted to a JPEG image. You are basically going to drag and drop the images, one at a time, into your powerpoint. Don’t worry about lining them up perfectly at this point. We will do that later
Most of the pattern companies that I do this process with will have their page dimensions 7″x10″ (so the pattern can be printed on both Letter and A4) or 8.5”x11” with no trim pages. You should be able to roughly get 5 pages across. Make sure you are paying attention to the pattern layout (Usually found in the beginning of the pattern instructions) to see how to lay it out on your powerpoint.
I personally like to start out with a few rows at a time. Once all the pages have been moved into my powerpoint, I then go in and put them in order. Don’t worry if they are a little bit off. You can either zoom in and fix it now, or wait until all pages have been dragged over to the powerpoint. If your pattern has pages that will need to be trimmed/cropped, I suggest starting with one or two rows at a time. Once they are lined up, you can select an image > Format Picture > Crop. When you crop, make sure you aren’t shrinking the image! Only cropping off the excess borders. Some paper patterns will overlap (hence the no trim). These ones you can just drag into place. When you line them up properly, they should kind of “click” in place.
* When the images are all in the powerpoint, go ahead and zoom in and make sure all the lines/markings are matching up, just how they would if you were to tape or glue them together. I like to select an image and use the arrow keys to move the page more precisely. You can also copy an entire row and align them. This is super nice! then you only have to move them up/down or left/right, depending on if you aligned the row or column.
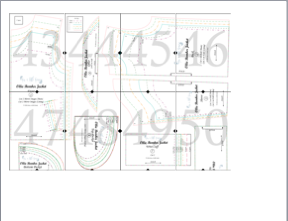
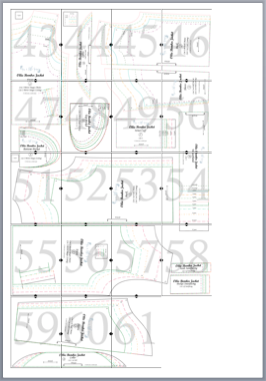
* Once all the images have been laid out and properly lined up, if there is a lot of excess/blank page space below the last row of the pattern, you can select all of the images, and hold control/command and X to CUT. Update the page height to however small it needs to be, and then PASTE. If you leave all of the images in the powerpoint and try to change the size of the slide, it will shrink all the images and disorient them. This will mess everything up, which is why we will CUT it and then PASTE it. If you have excess to the right of the images like I do here, that really doesn’t matter. The page is 36in wide, so with this particular pattern, I’m going to have excess in the width regardless. You can center it if you’d like, but it’s not necessary. I like to leave a small border on the outside to ensure nothing will get cut off while printing. However, if you don’t want to mess with changing the size of the page and possibly messing something up, you can leave it and just change the document size in Adobe Reader before it’s printed.
* If everything looks good, then it’s ready to be saved! Make sure you SAVE AS a PDF. I like to add COPY SHOP in the document name.
Boom! And that’s pretty much it. You can take the file to a Copy Shop or anywhere with large format printers! You can either use this as your master copy and trace the size you need, or cut it up! (EDITED TO ADD) All the rage these days is Projectors for Sewing. Basically you project your pattern onto your cutting mat and cut your fabric directly or trace it. No more having to store a million copyshop files. You can go paperless! Check out the Projectors for Sewing FB group for loads of info.
If you have any questions or need any help, leave a comment below and I will assist!
Happy printing and happy sewing!
Cheers!


You May Also Like
How To: Button Headband for FaceMasks
April 23, 2020
Palm Euro Suit – Reversible Hack
February 29, 2020
22 Comments
Divya Venkatesh
Hi Trissamarie..
Cant wait to try it..??
I hope it works well for me and some of the patterns I have!!
Trissa Bouwhuis
Awesome! I hope it works well for you! If you have any questions or run into any problems, let me know! <3
Kat
You have just enabled me in the best way possible. I have been trying to figure out how to do this for longer than I care to admit and now I can.
It will likely take me a week to get all my patterns converted with the one hour wait time. XD
Trissa Bouwhuis
Yay! Haha. I am so glad this is helpful for you! Just don’t stay up too late! =P
Genaelle
Hi Trissa,
Do you know it is more easy doing this with gimp free software.
Open the pdf file as layer, increase the workspace to fit the A0 dimension, then move the layers to get the puzzle assembled then, export to pdf !
That s done
Trissa Marie
I should try that! Thanks! I have gimp too, I just haven’t really played around with it to know what I’m doing!
Celeste Evans
Thank you so much for this informative article! It was listed in the Facebook group “Projectors For Sewing” as a resource.
Jaclyn
Thanks for this! About to try it out!
Laney
Thank you so much for these instructions. I just bought several patterns that do not have A0 files and I don’t have time to print, tape, and cut them all out before sewing since they need to get in the mail soon. I can believe how easy this was!!
Trissa Marie
Yay! I’m so glad it was helpful! It really isn’t hard. You mainly just need time to sit down and do it! <3
mimi
This is awesome. But how do I ensure my test square is the same size?
Trissa Marie
All the print at home patterns I’ve used are printed at 100%, so if you convert it correctly, your test square shouldn’t change from the print at home copy. Essentially, if you print the page with the test square (or any other page on the print at home pattern) it should match the large format sheet that was created. After converting the file to a JPG, if any resizing is done, it will mess up the entire thing and won’t be to the proper scale. Does that make sense? 🙂
Linda Coleman
This tutorial is awesome. Sewist are now cutting pdf patterns by projecting with a projector but you need the A0 size. Do you mind if I share this tutorial with a projector for sewing group on Facebook? Thanks
Trissa Marie
Thanks! I need to get my projector set up. And you are more than welcome to share away! <3
Jessica Campbell
You rock! Thanks for this. I have access to photoshop so I dropped the jpgs in there, and BAM! Done. I’m using an HDMI cable, connecting it from my laptop to my TV, and tracing my pattern directly onto tracing paper.. kind of like a light box. Gotta get inventive during covid-19!
Hannah Harrington
I’m so stuck. I’ve done the sizes of the PowerPoint slide but it’ll only fit 3 pieces across.
I can’t figure out where I’m going wrong. I have 33 pages of A4 pattern. Help!!!
Trissa Marie
Oh no! Did you make sure the page width on PowerPoint was 36”? And are your pages portrait or landscape?? If it’s landscape, you won’t be able to fit as many across unless you rotate the pages to fit differently. Hope that helps!
Oluebube Okafor
Thanks for this thoughtful post, unfortunately it has not worked for me as the A4 pages are not aligning well together. Also i cannot get the images to align in seperate slides because they are all attached to each other. I do not know if I’ve explained my challenges well, but i’m really struggling.
Trissa Marie
Are you using PowerPoint to put them together? Are you trying to align them in separate slides because the pattern is too big/long for one slide?
Trissa Marie
You are also more than welcome to send me an email so I can try and help you further!
mail@sewingandthings.com
Jessica Susan Regan
Thank you so much for this tutorial! So helpful since I’ve started using my projector!
Trissa Marie
Yay! So glad it has been helpful for you!