Ellie and Mac – Men’s Zip It
In the sewing world, there really aren’t very many patterns for men. Why? I have no idea. But because of this, I am definitely slacking in that department and have only made Scott a handful of things. It’s not my fault! (well…it probably still is…)
Luckily, Ellie and Mac just released the Men’s Zip It jacket (currently on sale through Sunday!). There is also a Women’s and a kid’s version so the whole family can match! This jacket is easily reversible and is fairly simple sew. The hardest part is probably the zipper. The perfect project for this time of year! (Unless you are in the southern hemisphere…bring on the swimsuits!!)
For this jacket, if the man you are sewing for is in between sizes, I highly suggest going with the smaller size. It is a fairly roomy jacket, especially in the body. It’s also better to use knits with more structure. If you use thin, super stretchy knits, it might look a little silly and baggy. If that’s the look you are going for, then go for it! There’s also a good chance you won’t need to lengthen the pattern, so keep that in mind. Once the paper pattern is cut out, put the back piece up against your man’s back and see where it hits. Keep in mind that there will be an extra 2-3 ish inches for the waistband.
When I sewed up this bad boy, I was a bit of a rebel. The main construction basically has you sew up the main and the lining separately (hood and all) and then attach them together with the waistband, zipper and cuffs, turning through an opening in the hood and topstitching all the way around. I personally don’t love this method. So I went off the path. I sewed up the main and lining but skipped attaching the hood, sewing everything else as is in the instructions. Once the zipper was installed to the main only, I then sewed the hood together, topstitching and all that good stuff and basted the finished hood (both the main and lining) to the main jacket (careful not to stitch through the zipper tape). Next, attaching the lining. When you sew your lining to the waistband, you will leave about a 4-5” gap where you will end up pulling the jacket through, right-side-out (I think this is a much cleaner look. You will hand-stitch it closed later). Sew the lining to the zipper, sew the neck (you may need to clip the seam allowance near the corner near the top end of the zipper, being careful not to cut through the stitches) and sew the lining to the cuffs, making sure you don’t twist the arms! Once everything is sewn, pull your jacket through the opening that was left in the waistband. Make sure you push out the zipper at the top near the hood. Topstitch along the zipper, around the neck and back down the other side of the zipper. Hand-stitch the waistband closed and vuala! (basically the same way you sew up the Ollie Bomber Jacket)
SUPPLIES
Fabric! I like a good thick cotton lycra for the bands. Depending on how warm you want the jacket will determine your fabric choice. Any 2-4 way stretch knits will work with at least 25% stretch. I’d heard a handful of folks use fleece for the lining. A few of my favorite fabric shops are as follows: Raspberry Creek Fabrics, So Sew English, Knitpop, The Fab Clique, Phee Fabrics. You can also checkout a Joann’s near you, but make sure you download the app and sign up for the texts so you can get the coupons. There is always at least one coupon that can be used!
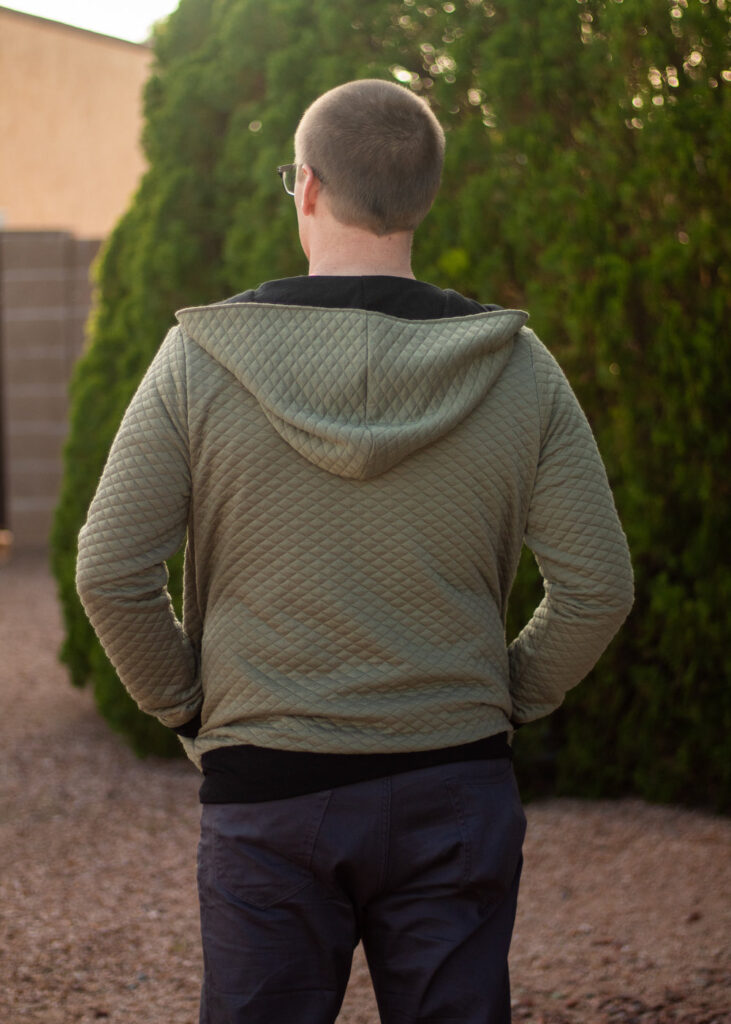
You will need a zipper that is 26”+ depending on your size. My favorite place for zippers and basically all other notions is Wawak. If your zipper is too long, you can always shorten it. For the jacket below, I ended up cutting off about 2 inches off the zipper. It’s a lot easier to cut some off than trying to make your zipper grow longer!


Isn’t he such a babe?! And he let me take his picture! <3 If you sew one of these up, I want to see! Link me in the comments!
Happy sewing!
Cheers!


You May Also Like

Movie Night Pajamas SewAlong: Day 1 – Prep Day
December 1, 2019
How To: Button Headband for FaceMasks
April 23, 2020